Areas covered:-
1) People modelling
We continued the modelling theme from last week and we made a ballerina. The head was made using a mould then painted using dust colours. The skirt was done using a cookie cutter which was then frilled. The small cutters were then used to add detail to the design. I used sugarpaste to make the hair but a sugargun could also be used.
Next week is the penultimate week of the course. We are making a stacked cake incorporating drapes and a burst.
Week by week blog of my lessons to complete the PME Sugarcraft Diploma course.
Thursday, 22 November 2012
Saturday, 17 November 2012
Week 9
Areas covered:-
1) Modelling
2) Painting
3) Starburst
The course is starting to get busy especially now we are designing our cakes for the final presentation.
Today we started off with painting using the models we made last week with the mexican paste. We used 3 painting techniques: using colour and rejuvenator spirit, using colours, lustre dust and rejuvenator spirit and trying out some new metallic paints. We painted some ducks and butterflies. I loved the metallic paints.
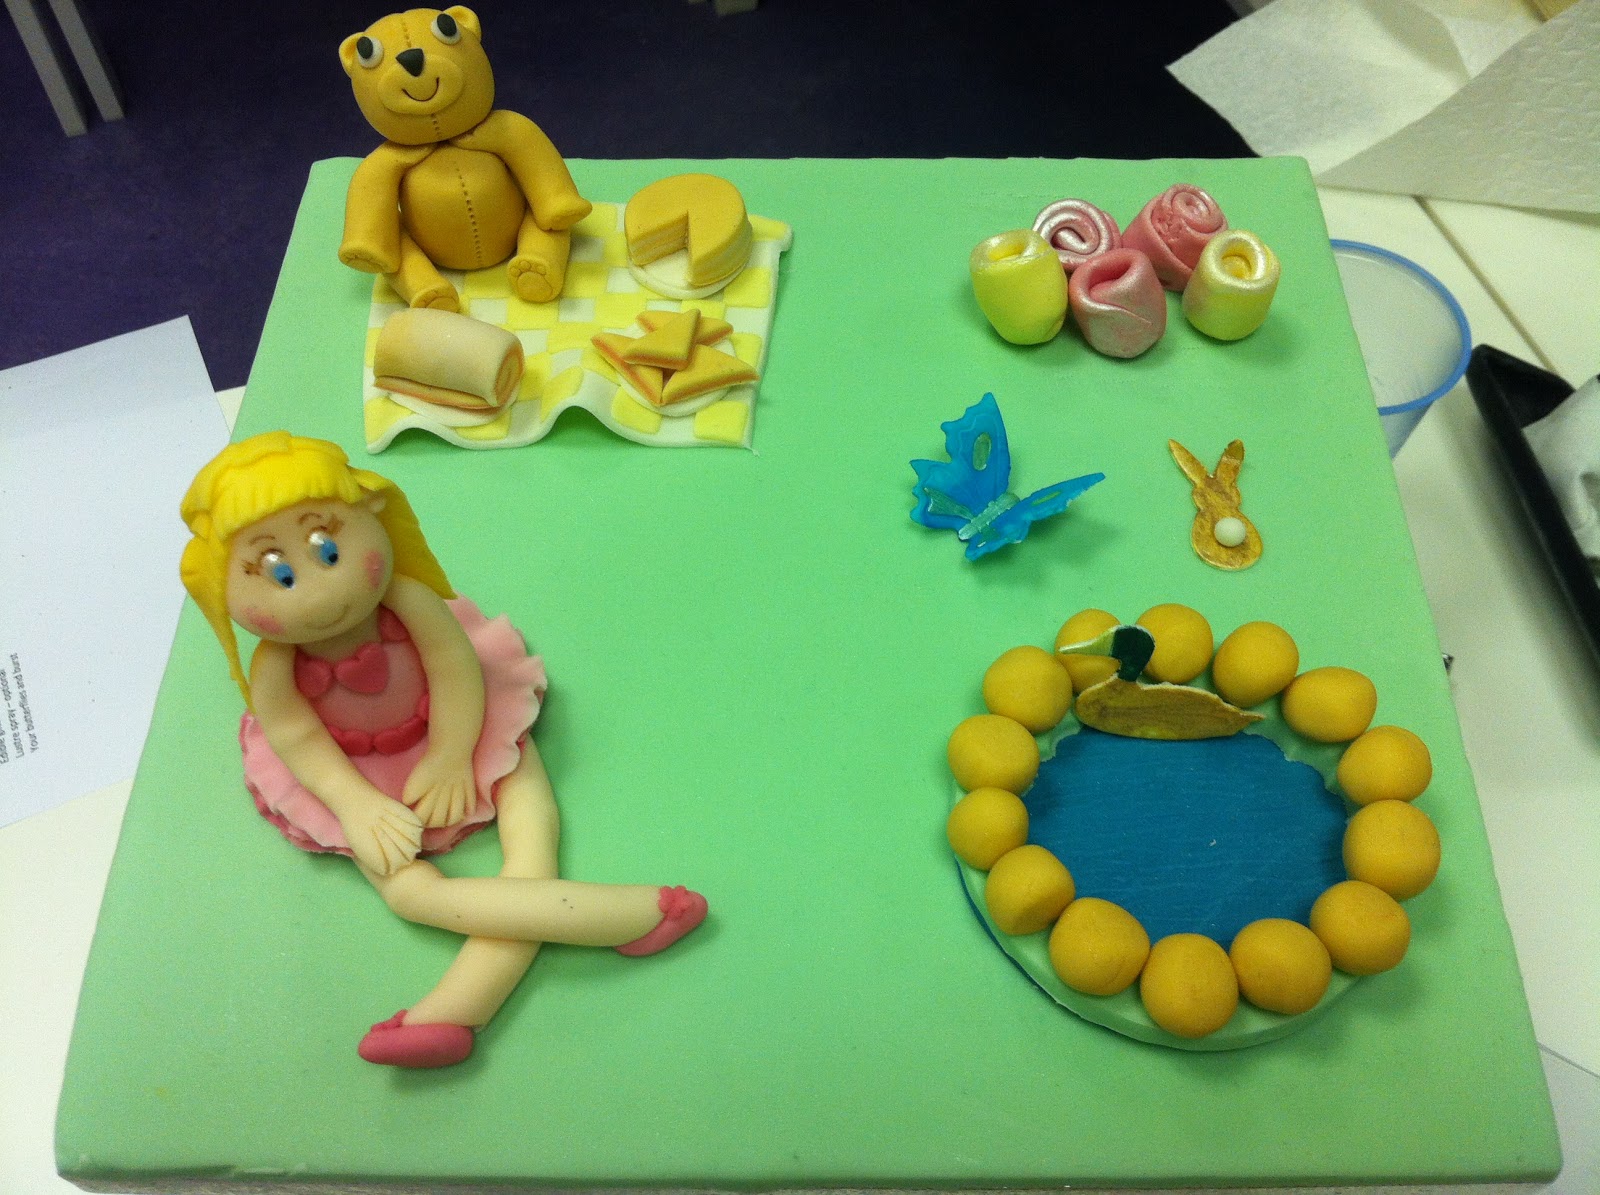
We then went on to modelling, making a teddy bears picnic. We had brought the iced board with us to add the scene. We used the square cutters to create the patchwork quilt and a size guide to make the teddy.
We also used glitter and metallic paint to decorate out bursts in preparation for the tiered cake.
1) Modelling
2) Painting
3) Starburst
The course is starting to get busy especially now we are designing our cakes for the final presentation.
Today we started off with painting using the models we made last week with the mexican paste. We used 3 painting techniques: using colour and rejuvenator spirit, using colours, lustre dust and rejuvenator spirit and trying out some new metallic paints. We painted some ducks and butterflies. I loved the metallic paints.
We then went on to modelling, making a teddy bears picnic. We had brought the iced board with us to add the scene. We used the square cutters to create the patchwork quilt and a size guide to make the teddy.
Thursday, 8 November 2012
Week 8
Areas covered:-
1) Broderie anglaise
2) Cut outs
We used a hexagonal cake attached different designs using the broderie anglaise cutters as shown below.
We then started making cut outs using modelling paste. We made a teddy bear cutter and used modelling tools for the details.
We also used mexican paste to prepare small cutouts for painting next week.
Wednesday, 24 October 2012
Week 7
Areas covered:-
1) Bows
1) Bows
Today we continued to work on the fruit cake we have been
using for the past 2 weeks by creating bows.
We then created the centre piece for a largest bow by using
the half ball mould to attach sugar pearls.
Bow 4 involved using two colours to create a different design.
Again I used the ivy cutter but this could also be done with spots and stripes.
Wednesday, 17 October 2012
Week 6
Areas covered:-
1) Inlaid plaque
2) Marbling
3) Swags
We continue to use the fruit cake we started last week.
First we covered the cake in white sugar paste covering the texture on the top. After smoothing the sides we used a large pastry cutter to cut out the top revealing the texture.
We then decorated the base using different techniques. We created marbled sugarpaste by mixing different colours of modeling paste and produced a variety of designs using cutters and tools.
We then created swags. We first used the kit book templates and scribe to mark out where they would go, large or small.
The swags were made using dowels and the ribbed rolling pin then attached to the cake using edible glue.
1) Inlaid plaque
2) Marbling
3) Swags
We continue to use the fruit cake we started last week.
First we covered the cake in white sugar paste covering the texture on the top. After smoothing the sides we used a large pastry cutter to cut out the top revealing the texture.
Shell boarder
Sugar marbles
Circles
The swags were made using dowels and the ribbed rolling pin then attached to the cake using edible glue.
Plain swag and stars
Ribbed swag and shell boarder
Next week we will finish the cake off by making the bows.
Thursday, 11 October 2012
Week 5
Areas covered:-
1. Marzipan a square cake
2. Textured board and cake
3. Starburst
1. Marzipan a square cake
2. Textured board and cake
3. Starburst
For homework we prepared a square fruit cake to use for the
next 3 lessons.
We first learnt how to make the cake level using a spirit
level and adding marzipan to balance. We
also used the marzipan to fill in any holes.
We covered the cake with a layer of marzipan and used
smoothers to make the edges square. We then left it to dry.
We then iced a board using a dark coloured sugarpaste we had
chosen. A textured rolling pin (deep
basketweave) was then used. This was put
to one side to dry.
We rolled out the same colour sugarpaste to cover just the
top of the cake, again this was textured using the rolling pin.
The cake and board were then put aside to continue next
week.
Wednesday, 3 October 2012
Week 4
Areas covered:-
1. Garrett frills
We spent the lesson making different types of garrett frills. We had prepared a round cake at home to use.
We used the cake markers to divide the cake into 6 then the templates to scribe onto the icing where the frills should go.
The frill cutter had attachments to give 3 different sizes. We started by using white modelling paste to cut out the shape and then frilled the edges using the bulbous cone tool. This was tricky at first.
We then used edible glue to attach it to the cake and cocktail sticks to allow it to dry in position.
Using our paste colours were coloured 3 different pieces of modelling paste in 3 shades then cut out the frill in the 3 different sizes. We attached these to the cake one above the other to give a great effect.
We also used the deepest frill and the small blossom cutters to give more detail.
Rainbow dust was used on the white frill we had created earlier to give a great effect. We also used our small blossom colours to create shapes to cover the join to the cake.
Next week we will be starting on the fruit cake.
Subscribe to:
Posts (Atom)